McInnes K. Rockstar Icon Designer
Подождите немного. Документ загружается.

Perspective131
Opacity Masks
In the past Opacity Masks were
the only way to make a transparent
gradient in Adobe Illustrator, but with
newer versions, the need to use this
feature is lost on some designers. As
with all things, it’s sometimes the old
techniques that yield the best results
and you shouldn’t overlook the effects
made with the Opacity Mask.
Opacity Masks can be used to control
the intensity and hue of highlights on
icons, create complex reflections and
mask raster effects. Using the Opacity
Mask will result in a much brighter
and better defined result than an
Opaque to Transparent gradient and
has the flexibility to add linear or radial
gradients to complex color blends.
To create an Opacit y Mask, select an
object or group of object you want to
mask, open the Transparency panel and
double click to the right of the image
thumbnail to go into an editing mode
to edit the mask area. Draw the area
you want to be the mask. White areas
will show the object, black will mask it,
and shades of grey will create varying
percentages of opacity.
By building icons with layered
transparent shapes, you can create
realistic and glossy icons that are
scalable and easy to edit.
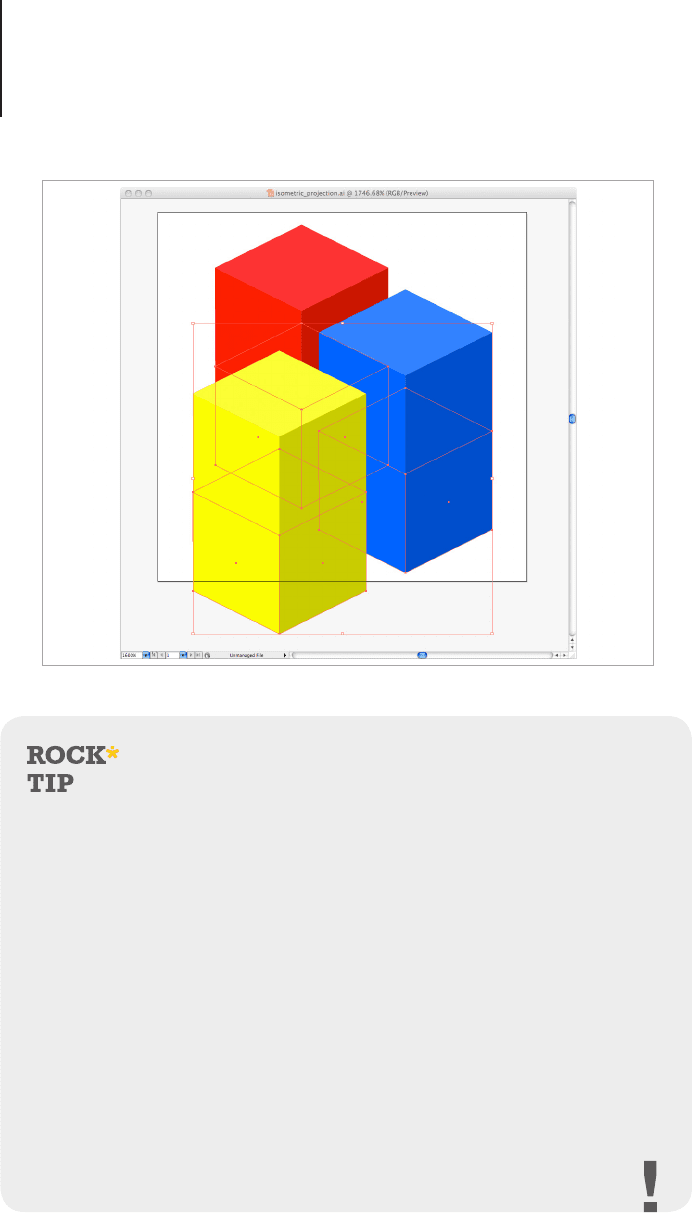
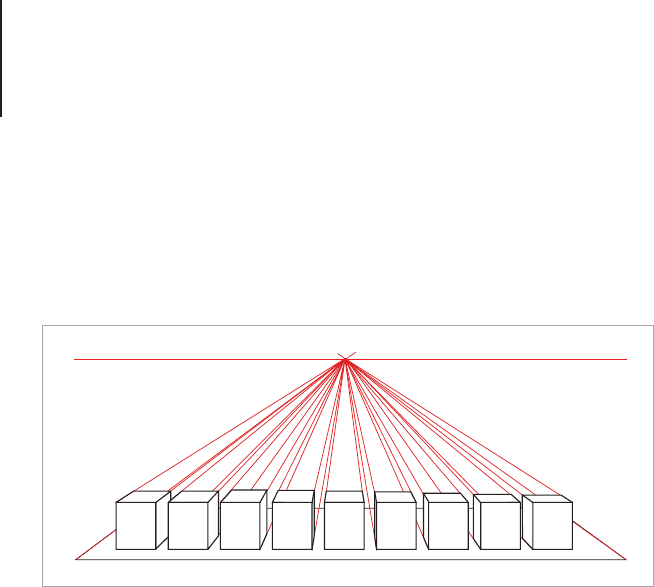
Create a copy of each cube below itself.
Perspective132
Group the objects with Command + G, then copy and paste them
in place with Command + C then Command + F. Double click into
the group of the duplicate cubes and apply a ll of a white to black
gradient to each.
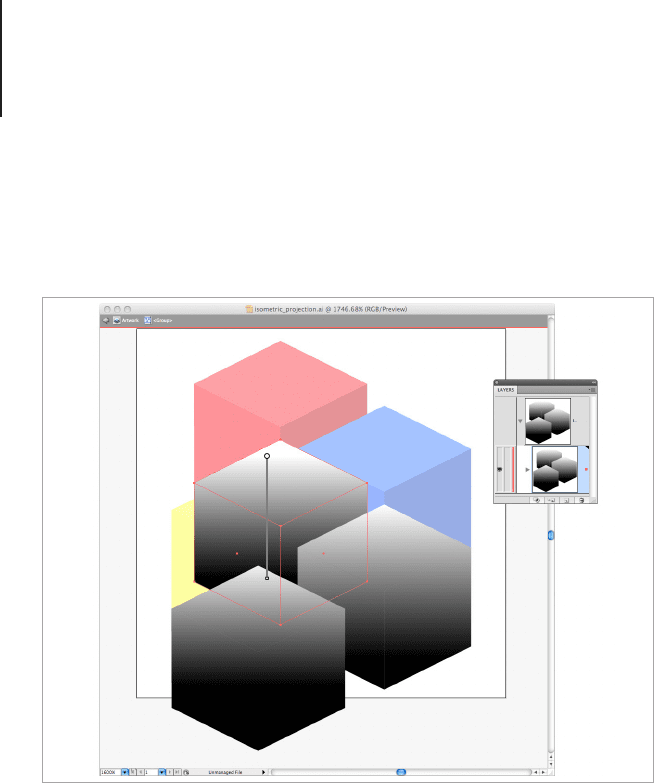
Click back to the main art board and select all of the duplicate
cubes and gradient cubes and create an Opacity Mask by going to
the Transparency panel and clicking the y out menu. Here you will
see an option to make an Opacity Mask, click it and the gradient
lled shapes should convert to the Mask for the cubes beneath it.
Apply a fill of a white to black gradient to each duplicate cube.
Perspective133
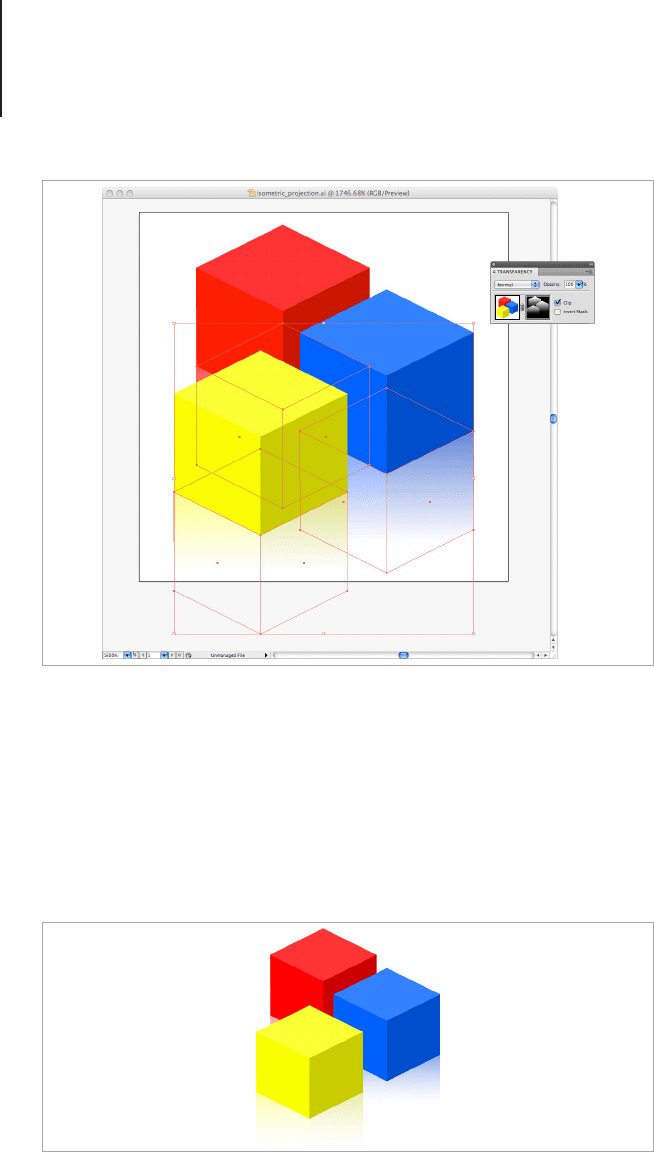
You can edit the gradient of the mask the same way you could edit
the ll of a regular shape, to edit the opacity mask, simply click
the Mask thumbnail in the Transparency panel. Remember to click
back to the illustration thumbnail to go back to the regular editing
mode. To hide the mask, Shift + Click the Mask thumbnail and
Option + Click the mask thumbnail to edit the mask without the art
layer.
Apply the Opacity Masks.
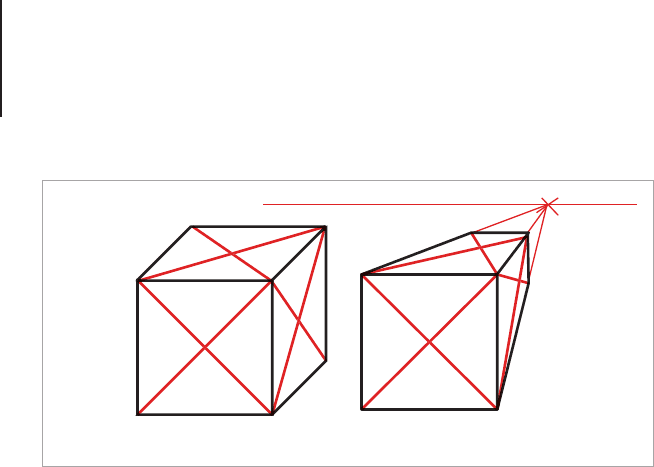
The final result.


View Points135
View Points
Now you know a little bit about perspective, let’s move on to view
points. Most icons are based around a theory of views rather than
the strict rules of perspective, so sometimes you will nd that you
will need to use your best judgment when creating a design rather
than following a pre-dened set of instructions. It’s for this reason
that 3D models aren’t often used for icon sets, each item will have
its own form of perspective to make it appear to be balanced
amongst a set. Not all items can have the same view applied, some
icons will be required to have a different perspective depending on
where they appear in an interface.
You will nd view points referred to in various icon guides such as
the Microsoft Developers Network (MSDN) and the Mac OS X and
Human Interface Guidelines. View points are a simplied version
of perspective that is used to instruct designers of the viewing
angle an icon should be drawn with rather than a specic set of
perspective rules. These viewing points are Desktop, Shelf, and
Front View. These three views make up the majority of the icon
views for Mac, PC and Linux based icons, so let’s take a closer
look at each style.
Why View Points are Better than Perspective for
most Icon Designs
As I mentioned earlier, view points for icons are different from
perspective views. As you would have discovered during the last
few tutorials, an object can change form depending on where it’s
located in relation to the vanishing point(s), viewing points.
View Points136
Why most small scale icons adopt the viewpoint theory is because
perspective adds foreshortening to an image which isn’t ideal
for precise pixel rendering. As you know, pixels use the invisible
grid on your computer screen to render very small dots of color
that make up an image. The closer you zoom in, the larger the
pixel squares will become. The reason why your screen can show
clear images is the resolution. Each line and shape of an image
is made up of millions of little pixel “lights,” but when it comes to
icon rendering, the number of pixels you are required to use is
signicantly less. When a line is slightly askew to the horizontal,
vertical and diagonal lines of the grid, the pixels will add a slightly
transparent pixel to approximate the line. When this is done at a
small scale where every pixel counts, you can end up with blurry
lines that appear to be thicker than the lines that are rendering
properly against the grid. Views are handy as you can create a
three dimensional icon while still rendering the lines in a way that
keeps them crisp.
In the case of Application style Mac OS icons, the rules of
perspective simply cannot be used. If you look at the dock
introduced with Mac OS X Leopard you will see that it’s based on
one-point perspective, but for icons to match this, they would have
to be rendered in an almost limited number of views because the
Desk View
1 Point Pers
p
ective
View point vs. Perspective.
View Points137
scale and location of an icon on the dock will change the viewing
angle. Let’s not forget that the doc can also be positioned to the
left, right or bottom of the screen. If perspective was to be used
with this style of icon, then the visual balance of the icons on the
dock would be signicantly disrupted.
So, while perspective is a great skill to have when making
medium to large scale custom icons, web graphics and detailed
illustrations, there’s no practical way it can be used to create a
uniform viewing experience for desktop and Toolbar icons.
Flat View Icons
Flat View icons fall under a viewing category of their own, as they
don’t have any special instructions other than creating a design
that is legible at a variety of scales and contrasts. Flat View icons
should have very little to no lighting effects, and no drop shadow
effects.
Tips:
• Using a grid will help you balance the designs
• Try and use the Pen tool and Vector Shapes as often as you
can, they are easy to edit if you need to and are scalable.
Why perspective isn't used for desktop or dock style icons.

View Points138
• Keep the line weight and details consistent for each design,
a complex design next to a simple one will disrupt the visual
harmony of the icon set.
Tips to Create a Pixel Icon Set In a Flat View
Style with Adobe Photoshop CS5
Let’s begin with a super simple exercise in using Pathnder options
to make at view pixel style icons. You will learn how to combine
basic shapes to create a set of retro style pixel icons. I will guide
you through the basics of this style beginning with blocking out the
basic shape, tweaking the design using the snap to grid function
and a pixel grid and then how to combine shapes and delete points
to make a clean nished result. Finally I will share a scaling trick so
you can save the icons at various sizes without having to redesign
them.
For now, I’ll be using Adobe Photoshop to demonstrate the PS
vector tools which can sometimes be a bit trickier than Illustrators
to use. In the next exercise on creating glyph style icons however,
we will be using Adobe Illustrator.
Setting the Canvas Space
Set the width and height of the art board in pixels and make
sure that the color space is set to be RGB. If you’re working
in Photoshop, it’s also handy to have the background set to
transparent so you can see exactly where the art space begins and
ends.
Once you have made the canvas for your icon, set the document
grid to represent pixels. You can do this by setting the gridline to
every 10 pixels with a sub division of 10. This will show you where
the pixel boundaries are and help you to make shapes that will
clearly render along these lines.
View Points139
The Shape Tools
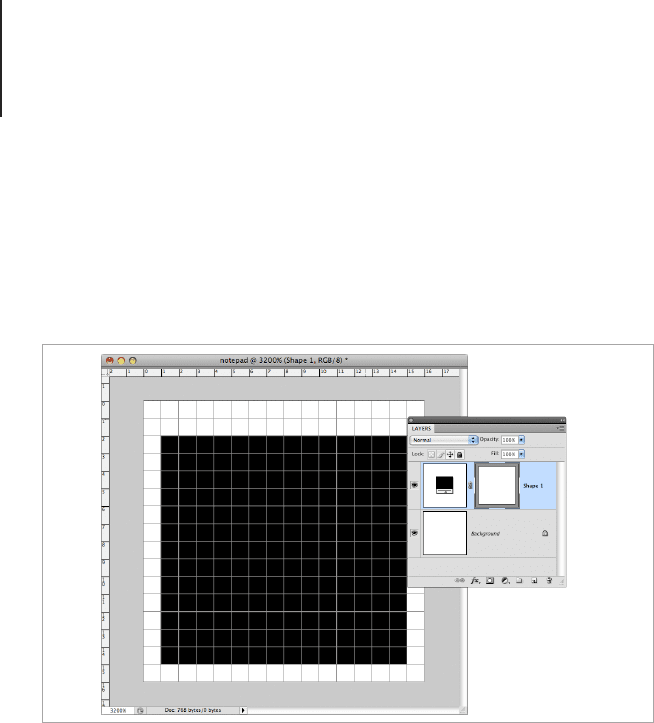
Let’s make something from just a few straight lines to begin
with. A notepad is perfect for this. Make sure your color is set to
something dark, I’m using black, then take the Rectangle tool and
add in the main shape of the notepad.
You will notice that the shape you have made is a bit dif ferent from
vector shapes you may have used in vector editing software such
as Adobe Illustrator or Inkscape. The way Photoshop makes vector
shapes is to use the vector as a mask for a colored background.
There are a few cool things you can do with this that I will show you
later on in the tutorial.
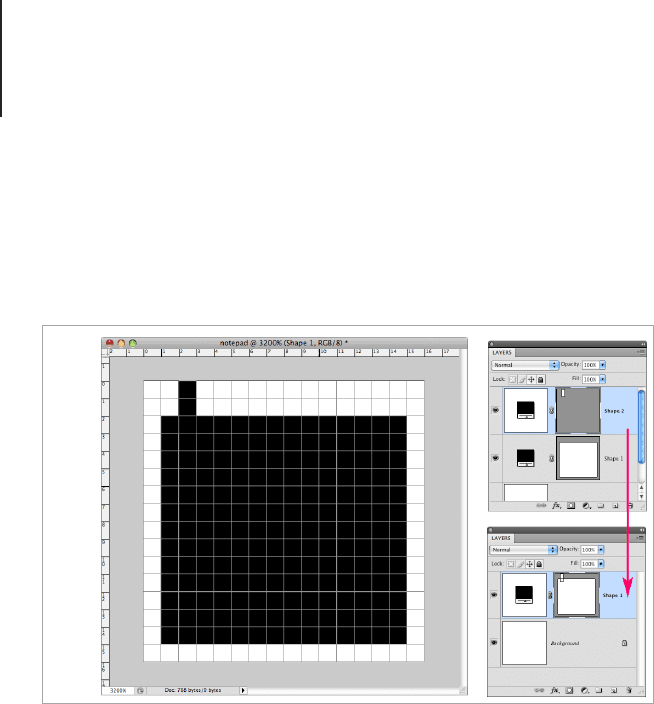
Let’s make the rings at the top of the notepad. Take the Rectangle
tool and draw the rst ring at the top of the notepad, you will notice
that this makes a new shape layer. Every time you add a vector
shape directly to the canvas it will make a new shape layer. There
are a few tricks that you can use to combine vector shapes. One
is to hold the shift button down as you draw the image onto the
canvas. You only need to hold shift as you begin, continuing to
Use the Rectangle tool to create the main shape of the notepad.
View Points140
hold shift will constrain the proportions of the shape and you will
end up drawing a square. The other way is to direct select any
shapes you want to combine with the Direct Selection tool (A) and
copy > paste them into the vector mask you want to combine them
with. Make sure that you select the vector mask and not the layer.
The next tip is to select the rst loop with the Direct Selection
tool and copy + drag the next few into place by holding down the
Option key. When you get to the last loop you may need to tweak
the body of the notepad. When you design miniature icons there’s
sometimes a bit of tweaking that needs to happen as you work.
Because there are a limited number of pixels you will often nd that
balancing the designs will require constant tweaks to the shape.
This is another reason that while the Pen tool can give you similar
results, it’s not as editable as vector shapes.
Add the first ring of the notepad with the Rectangle tool.