Lowe D. Networking For Dummies
Подождите немного. Документ загружается.


Book VII
Chapter 1
Installing and
Configuring Windows
Server 2008 R2
487
Running Setup
Figure 1-2:
Welcome
to Windows
Setup!
3. Enter the 25-character product key and then click Next.
Because the key is so long, it’s easy to make a mistake. If Setup
complains that the product key is invalid, don’t panic. Just try again.
After you input the correct product key, the wizard asks which edition
of the operating system you want to install. The options here depend on
which version you have purchased. For the Standard Edition, you can
choose to install the full Standard Edition server operating system or the
Core edition.
4. Select the edition you want to install and then click Next.
The Setup Wizard displays the License Agreement information. Read it if
you enjoy legalese.
5. Click I Accept the License Terms and then click Next.
The Setup Wizard then asks whether you want to perform an upgrade
installation or a full installation.
6. Click the installation option you want to use.
Setup continues by displaying the computer’s current partition
information. Here, you can select the partition that you want to use for
the installation. If necessary, you can reconfigure your partitions from
this screen by deleting existing partitions or creating new ones. I assume
here that you want to create a single partition that uses all available
space on the drive.
49_625873-bk07ch01.indd 48749_625873-bk07ch01.indd 487 9/21/10 10:37 PM9/21/10 10:37 PM
488
Running Setup
7. Select the partition on which you want to install Windows and then
click Next.
Setup now formats the drive and then copies files to the newly formatted
drive. This step usually takes awhile. I suggest you bring along your
favorite book. Start reading at Chapter 1.
After all the files have been copied, Setup reboots your computer. Then,
Setup examines all the devices on the computer and installs any
necessary device drivers. You can read Chapter 2 of your book during
this time.
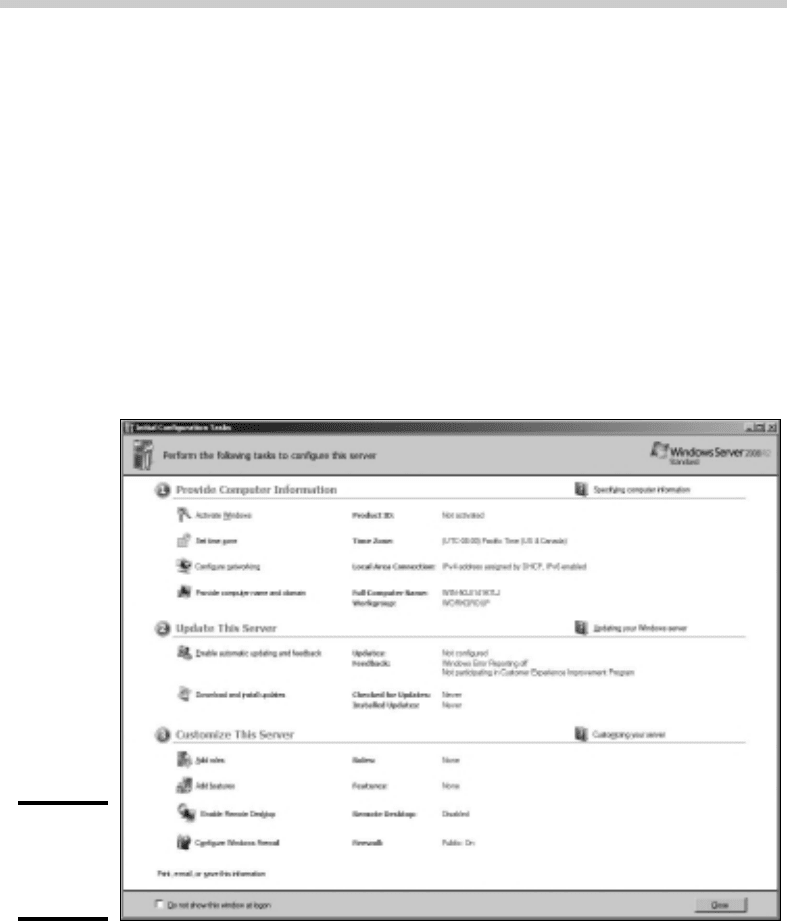
When Setup finishes installing drivers, it displays the Initial
Configuration Tasks page, shown in Figure 1-3. You can use this page to
perform additional configuration tasks that are required to make your
server usable.
Figure 1-3:
The Initial
Configuration
Tasks page.
In particular, the Initial Configuration Tasks page provides the following
capabilities:
• Set the time zone.
• Configure networking.
• Provide the computer name and domain.
• Enable automatic updating.
49_625873-bk07ch01.indd 48849_625873-bk07ch01.indd 488 9/21/10 10:37 PM9/21/10 10:37 PM
Book VII
Chapter 1
Installing and
Configuring Windows
Server 2008 R2
489
Adding Server Roles and Features
• Download and install updates.
• Add more server roles and features.
• Enable remote desktop access.
• Configure the Windows Firewall.
You’ll want to work your way through each of these steps. The steps are
pretty self-explanatory, and simple wizards help guide you through each
task.
You can find more information about adding server roles and features in the
next section, “Adding Server Roles and Features.”
Adding Server Roles and Features
Server roles refer to the roles that your server can play on your network —
roles such as a file server, a Web server, or a DHCP or DNS server. Features
refer to additional capabilities of the Windows operating system itself, such
as the .NET Framework or Windows Backup. Truthfully, the distinctions
between roles and features are a bit arbitrary. For example, the Web server
is considered a role, but the Telnet server is a feature. Go figure.
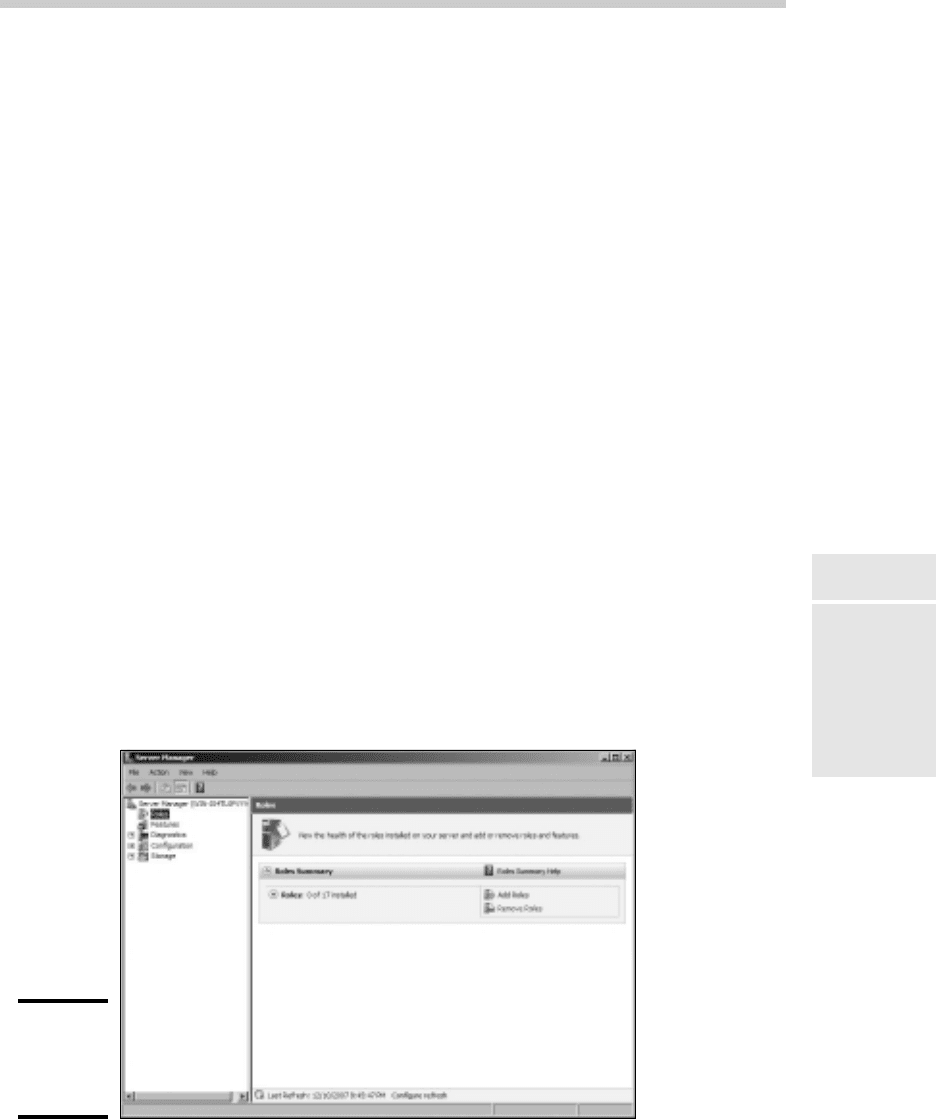
The Initial Configuration Tasks page that was shown in Figure 1-3 lets you
add additional roles or features to your server. After you’ve finished with
the initial configuration of your server, you can choose Start➪Administrative
Tools➪Server Manager to bring up the Server Manager page, as shown in
Figure 1-4. As you can see, this page also provides links that let you add
roles or features.
Figure 1-4:
The Server
Manager
page.
49_625873-bk07ch01.indd 48949_625873-bk07ch01.indd 489 9/21/10 10:37 PM9/21/10 10:37 PM
490
Adding Server Roles and Features
The following procedure describes how to install server roles. The proce-
dure for installing server features is similar.
1. Click the Add Roles link either on the Server Manager page or on the
Initial Server Configuration Tasks page.
Either way, the Add Roles Wizard appears, as shown in Figure 1-5.
Figure 1-5:
The Add
Roles
Wizard.
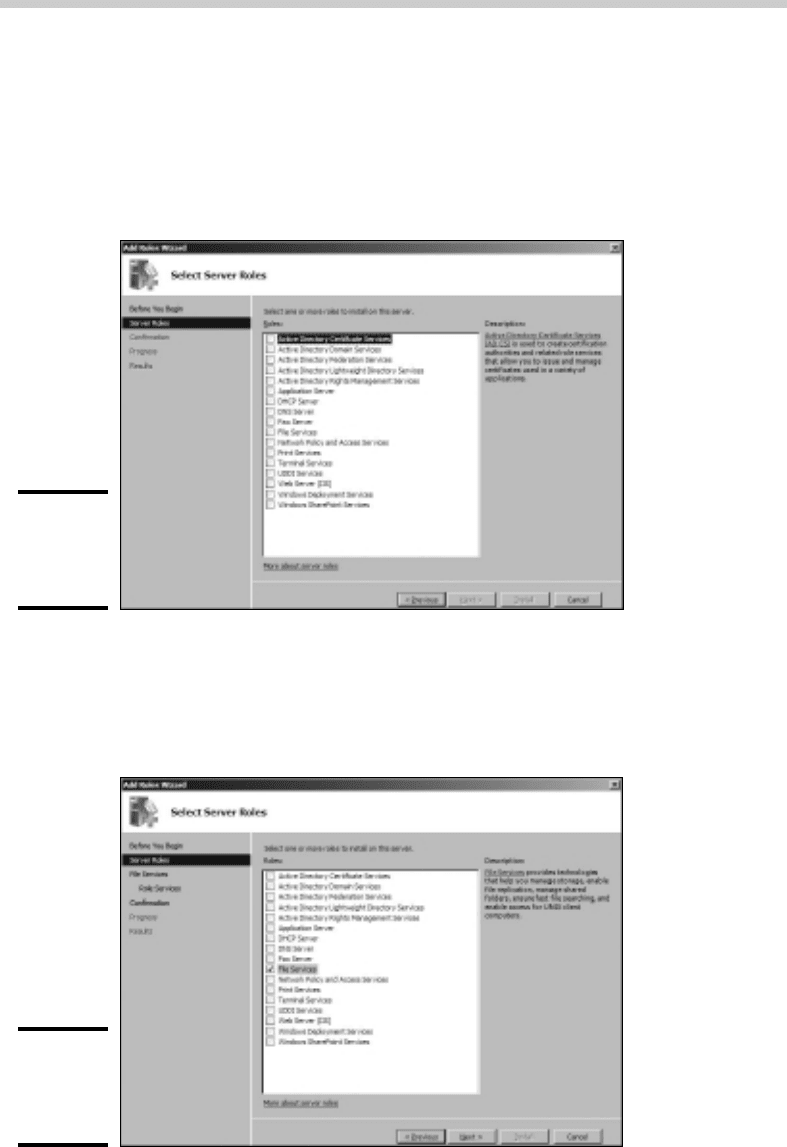
2. Click Next.
The Select Server Roles page shown in Figure 1-6 appears. This page lets
you select one or more roles to add to your server.
Figure 1-6:
The Select
Server
Roles page.
49_625873-bk07ch01.indd 49049_625873-bk07ch01.indd 490 9/21/10 10:37 PM9/21/10 10:37 PM
Book VII
Chapter 1
Installing and
Configuring Windows
Server 2008 R2
491
Adding Server Roles and Features
3. Select one or more roles to install.
You can click each role to display a brief description of the role. For
example, if you click the File Services role, the following text is displayed:
File Services provides technologies that help you manage storage,
enable file replication, manage shared folders, ensure fast file
searching, and enable access for UNIX client computers.
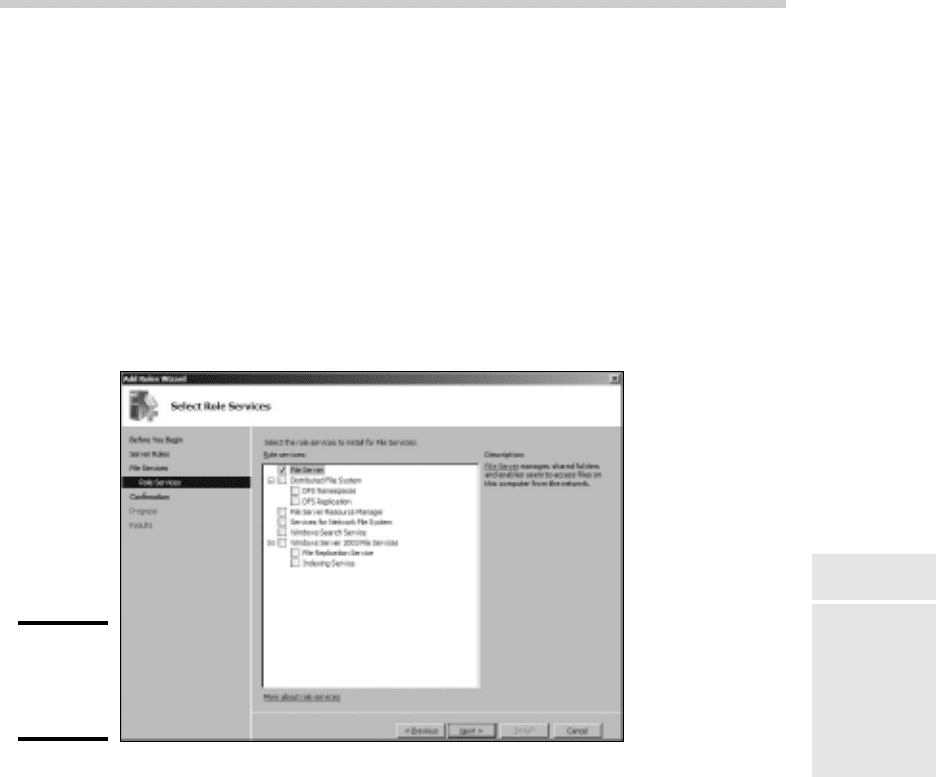
4. Click Next.
Depending on the role or roles you select, an additional page may be
displayed asking you to select the role services you want to install. For
example, Figure 1-7 shows the Role Services page for the File Services
role.
Figure 1-7:
The Role
Services
page.
5. Select the services you want to install.
Again, you can select each service to see a brief text description of the
service. For example, if you select Windows Search Service, the following
text is displayed:
Windows Search Service permits fast file searches on this server
from clients that are compatible with Windows Search Service.
Windows Search Service is intended for desktop search or small file
server scenarios, and not for enterprise scenarios.
6. Click Next.
A confirmation page appears, listing the roles and services you have
selected.
7. Click Install.
49_625873-bk07ch01.indd 49149_625873-bk07ch01.indd 491 9/21/10 10:37 PM9/21/10 10:37 PM

492
Adding Server Roles and Features
Windows installs the server role and its services. A progress screen
is displayed during the installation so you can gauge the installation’s
progress. When the installation finishes, a final results page is displayed.
8. Click OK.
You’re done!
49_625873-bk07ch01.indd 49249_625873-bk07ch01.indd 492 9/21/10 10:37 PM9/21/10 10:37 PM

Chapter 2: Managing
Windows Server 2008
In This Chapter
✓ Working with the trusty Administrator account
✓ Using Remote Desktop Connection to administer a server from the
comfort of your desktop
✓ Perusing the list of Microsoft Management Consoles
✓ Customizing your own management console
T
his chapter provides an introduction to the most important tools that
you’ll use to administer Windows Server 2008.
Using the Administrator Account
Windows comes with a built-in account named Administrator that has
complete access to all the features of the server. As a network administrator,
you frequently log on using the Administrator account to perform maintenance
chores.
Because the Administrator account is so powerful, you should always enforce
good password practices for it. In other words, don’t use your dog’s name as
the Administrator account password. Instead, pick a random combination of
letters and numbers. Then, change the password periodically.
Write down the Administrator account password and keep it in a secure
location. Note that by “secure location,” I don’t mean taped to the front of
the monitor. Keep it in a safe place where you can retrieve it if you forget
it, but where it won’t easily fall into the hands of someone looking to break
into your network.
Note that you cannot delete or disable the Administrator account. If
Windows allowed you to do that, you could potentially find yourself locked
out of your own system.
As much as possible, you should avoid using the Administrator account.
Instead, you should create accounts for each of your system administrators
and grant them administrator privileges by assigning their accounts to the
Administrators group.
50_625873-bk07ch02.indd 49350_625873-bk07ch02.indd 493 9/21/10 10:38 PM9/21/10 10:38 PM

494
Using Remote Desktop Connection
Although you can’t delete or disable the Administrator account, you
can rename it. Some network managers use this ability to hide the true
Administrator account. To do this, just follow these steps:
1. Rename the Administrator account.
Write down the new name you use for the Administrator account, along
with the password, and store it in a top-secret secure location.
2. Create a new account named Administrator and assign it a strong
password, but don’t give this account any significant privileges.
This new account will become a “decoy” Administrator account. The
idea is to get hackers to waste time trying to crack this account’s
password. Even if a hacker does manage to compromise this account, he
won’t be able to do anything when he gets in.
Using Remote Desktop Connection
One of the most useful tools available to system administrators is a program
called Remote Desktop Connection, or RDC for short. RDC lets you connect to
a server computer from your own computer and use it as if you were actually
sitting at the server. In short, RDC lets you administer your server computers
from your own office.
Enabling remote access
Before you can use Remote Desktop Connection to access a server, you
must first enable remote access on the server. To do that, follow these steps
(on the server computer, not your desktop computer):
1. Open the Control Panel and then double-click System.
This step brings up the System applet.
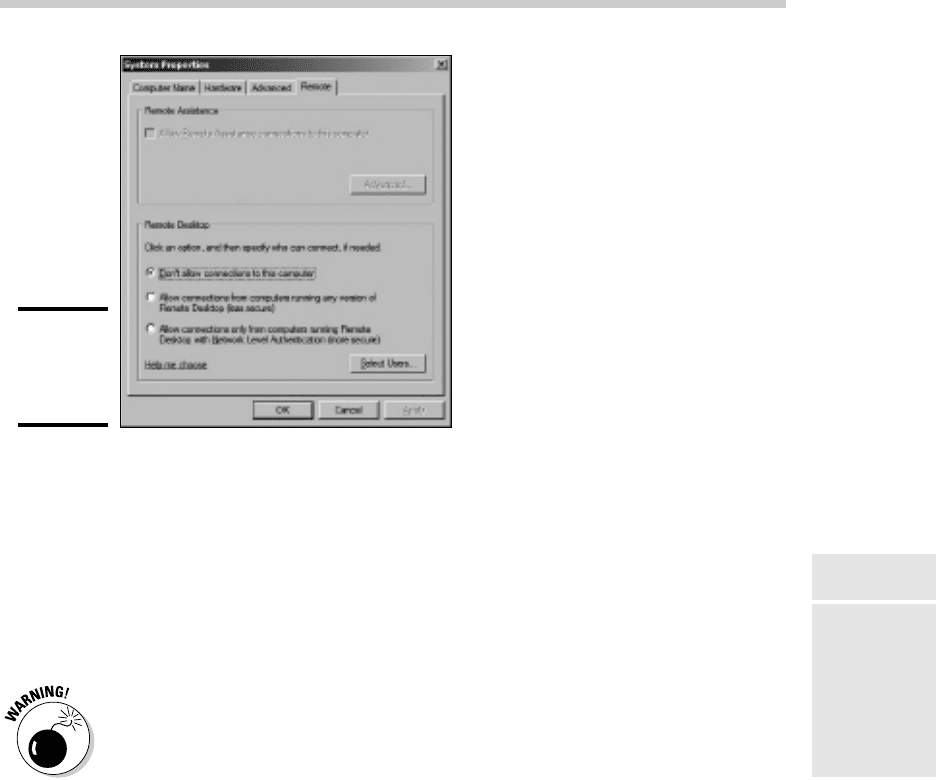
2. Click the Remote tab.
This step brings up the remote access options, as shown in Figure 2-1.
3. Select one of the two Allow Connections check boxes.
Which one should you select? If you select Allow Connections Only from
Computers Running Remote Desktop with Network Level Authentication,
you can connect to the server only from clients running Windows Vista
or Windows 7. The other option, Allow Connections from Computers
Running Any Version of Remote Desktop, lets you connect from
Windows XP clients.
4. Click OK.
50_625873-bk07ch02.indd 49450_625873-bk07ch02.indd 494 9/21/10 10:38 PM9/21/10 10:38 PM
Book VII
Chapter 2
Managing Windows
Server 2008
495
Using Remote Desktop Connection
Figure 2-1:
Configuring
remote
access.
You’re done! Repeat this procedure for each server computer you want to
allow access to.
Here are a few other points to ponder concerning remote access:
✦ You can click the Select Users button to create a list of users who are
authorized to access the computer remotely. Note that all members of
the Administrators group are automatically granted access, so you don’t
have to add administrators to this list.
✦ There’s no question that RDC is convenient and useful. However, it’s
also inherently dangerous. Don’t enable it unless you’ve also taken
precautions to secure your Administrator accounts by using strong
passwords; you should also already have a firewall installed to keep
unwanted visitors out of your network. For more information on account
security, see Book VII, Chapter 6.
Connecting remotely
After you’ve enabled remote access on a server, you can connect to the
server by using the Remote Desktop Client that’s automatically installed
with Windows XP, Windows Vista, or Windows 7. Here’s the procedure for
Windows XP:
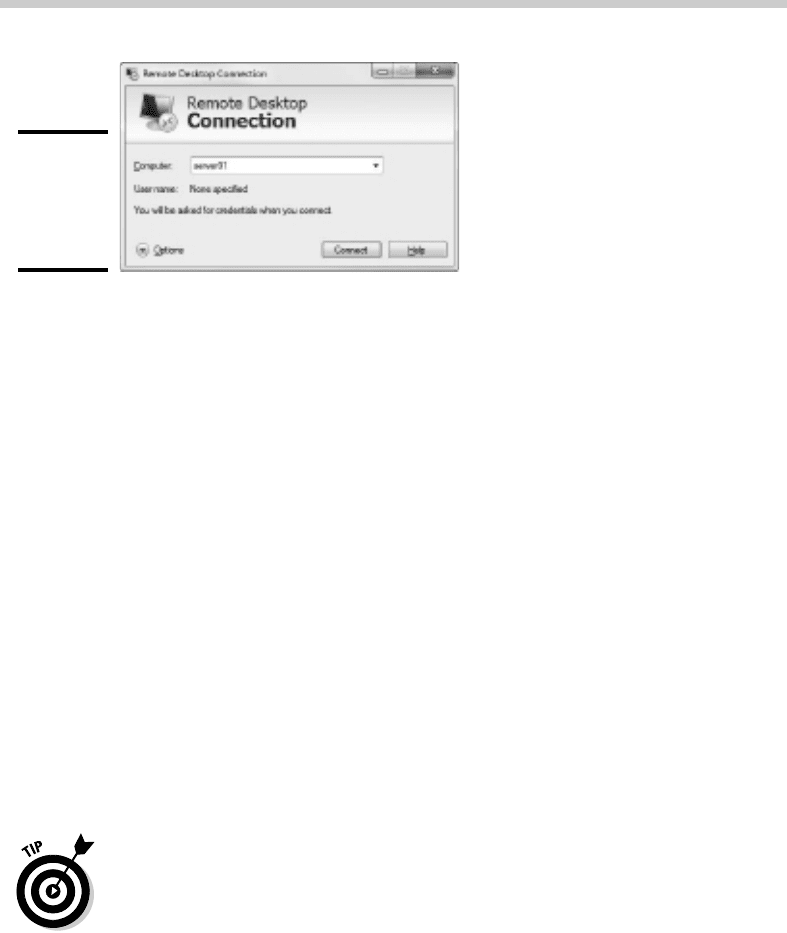
1. Choose Start➪All Programs➪Accessories➪Communications➪Remote
Desktop Connection.
The Remote Desktop Connection client comes to life, as shown in
Figure 2-2.
50_625873-bk07ch02.indd 49550_625873-bk07ch02.indd 495 9/21/10 10:38 PM9/21/10 10:38 PM
496
Using Remote Desktop Connection
Figure 2-2:
Connecting
with Remote
Desktop
Connection.
2. Enter the name of the computer you want to connect to.
Alternatively, you can use the drop-down list to select the computer
from the list of available computers.
3. Click the Connect button.
You’re connected to the computer you selected, and the computer’s
logon screen is displayed.
4. Log on and use the computer.
After you log on, you can use the computer as if you were sitting right in
front of it.
Here are a few other tips for working with the Remote Desktop Connection
client:
✦ When you’re using the Remote Desktop Connection client, you can’t just
Alt+Tab to another program running on the client computer. Instead,
you must first minimize the RDC client’s window by clicking its minimize
button. Then, you can access other programs running on your computer.
✦ If you minimize the RDC client window, you have to provide your logon
credentials again when you return. This security feature is there in case
you forget you have an RDC session open.
✦ If you use RDC a lot on a particular computer (such as your own desktop
computer), I suggest you create a shortcut to RDC and place it on the
desktop, at the top of the Start menu, or in the Quick Launch portion of
the taskbar.
✦ RDC has several useful configuration options that you can access by
clicking the Options button.
50_625873-bk07ch02.indd 49650_625873-bk07ch02.indd 496 9/21/10 10:38 PM9/21/10 10:38 PM